
For an AD FREE PDF download of this pattern, check out my Etsy here!
Level: Beginner
If you need any help with this pattern, please feel free to message my Etsy shop, DM me on Instagram @crochetbycolleen OR e-mail me crochetbycolleenUS@gmail.com
This pattern is available for personal use only. You cannot share or sell this written pattern. You can sell your own appliqués but please tag @crochetbycolleen for design credit. Thank you so much for your cooperation!
Make sure to join my community by entering in your email address for my newsletter! You’ll never miss a free pattern, news or update! 🙂 Sign up HERE
Check out my notes where I put all my inspiration for the truck and my original pattern! I always use my Ipad and the app GoodNotes to make my patterns and write my notes
You can check out the full video tutorial here!
YOU WILL NEED
-
I use 4-medium weight yarn.
-
5mm crochet hook
-
Colors you will need: truck color (I am using Dusty Blue) black, white, orange and light brown
-
A hot glue gun and glue sticks
All items linked here:
The stitches/ skills you will need to know and KEY:
-
Chain (ch)
-
Slip Stitch (sl st)
-
Single crochet (sc)
-
Half double crochet (hdc)
-
Decrease (dec)
-
Increase (inc)
-
Weave ends and finish off.

Final Dimensions: 4 inches x 5.5 inches
Additional items I use:


CROCHET PATTERN
Truck:
With your truck color and a 5mm crochet hook, chain 21
Row 1: sc in the second chain from the hook, sc across (20 sc)
Row 2-5: sc across (20 sc)
Row 6: dec, 9 sc (10 sts)
Row 7: sc in the first 2 sts (7 sc)
Row 8: dec, 5 sc (6 sts)
Row 9: sc across (6 sc)
Row 10: dec, 4 sc (5 sts)
Row 11: sc across (5 sc)
Finish off and weave ends.
Window:
With white and a 5mm crochet hook, chain 6
Row 1: sc in the second chain from the hook, sc across (5 sc)
Row 2: dec, 3 sc (4 sts)
Row 3: 2 sc, dec (3 sts)
Finish off and weave ends.
Wheels:
With white make a magic circle
Round 1: 4 sc into the magic circle, closed. Keep working in a round, do not join.
Round 2: 2 sc in each stitch around (8 sc)
Round 3: switch to black *sc in the first stitch, 2 sc in the next stitch.* Repeat from *—* around (12 sc)
Finish off and weave ends. MAKE 2.
Wheel Cover:
With truck color, chain 7
Sc in the second chain from the hook, 2 sc in the next chain. Repeat (1sc, 2sc) until all the way across the chain (9 sc)
Finish off and weave ends. MAKE 2.
Truck Fence:
With light brown, chain 10
Make a sl st in the second chain from the hook, sl st across the rest of the chain. Finish off and weave ends.
Pumpkins:
Large Pumpkin:
Round 1: Make 5 sc into a magic circle, pull closed. Keep going in a round, do not join.
Round 2: 2 sc in each stitch around (10 sc)
Round 3: sl st in the first stitch, 2 hdc in the next 2 stitches, sc in the next three stitches, 2 hdc in the next two stitches, sl st in the next 2 stitches (14 sts)
Finish off and weave ends.
Attach light brown to the top with a sl st, chain 3, sl st in the second chain from the hook, sl st in the next chain. Sl st back into the same stitch you attached the brown in. Finish off and weave ends.
Small Pumpkin:
Round 1: Make 4 sc into a magic circle, pull closed. Keep going in a round, do not join.
Round 2: 2 sc in each stitch around (8 sc)
Round 3: sl st in the first stitch, 2 sc in the next 2 stitches, sl st in the next two stitches, 2 sc in the next two stitches, sl st in the next stitch (12 sts)
Finish off and weave ends.
Attach light brown to the top with a sl st, chain 2, sl st in the second chain from the hook Sl st back into the same stitch you attached the brown in. Finish off and weave ends.
Assembly:
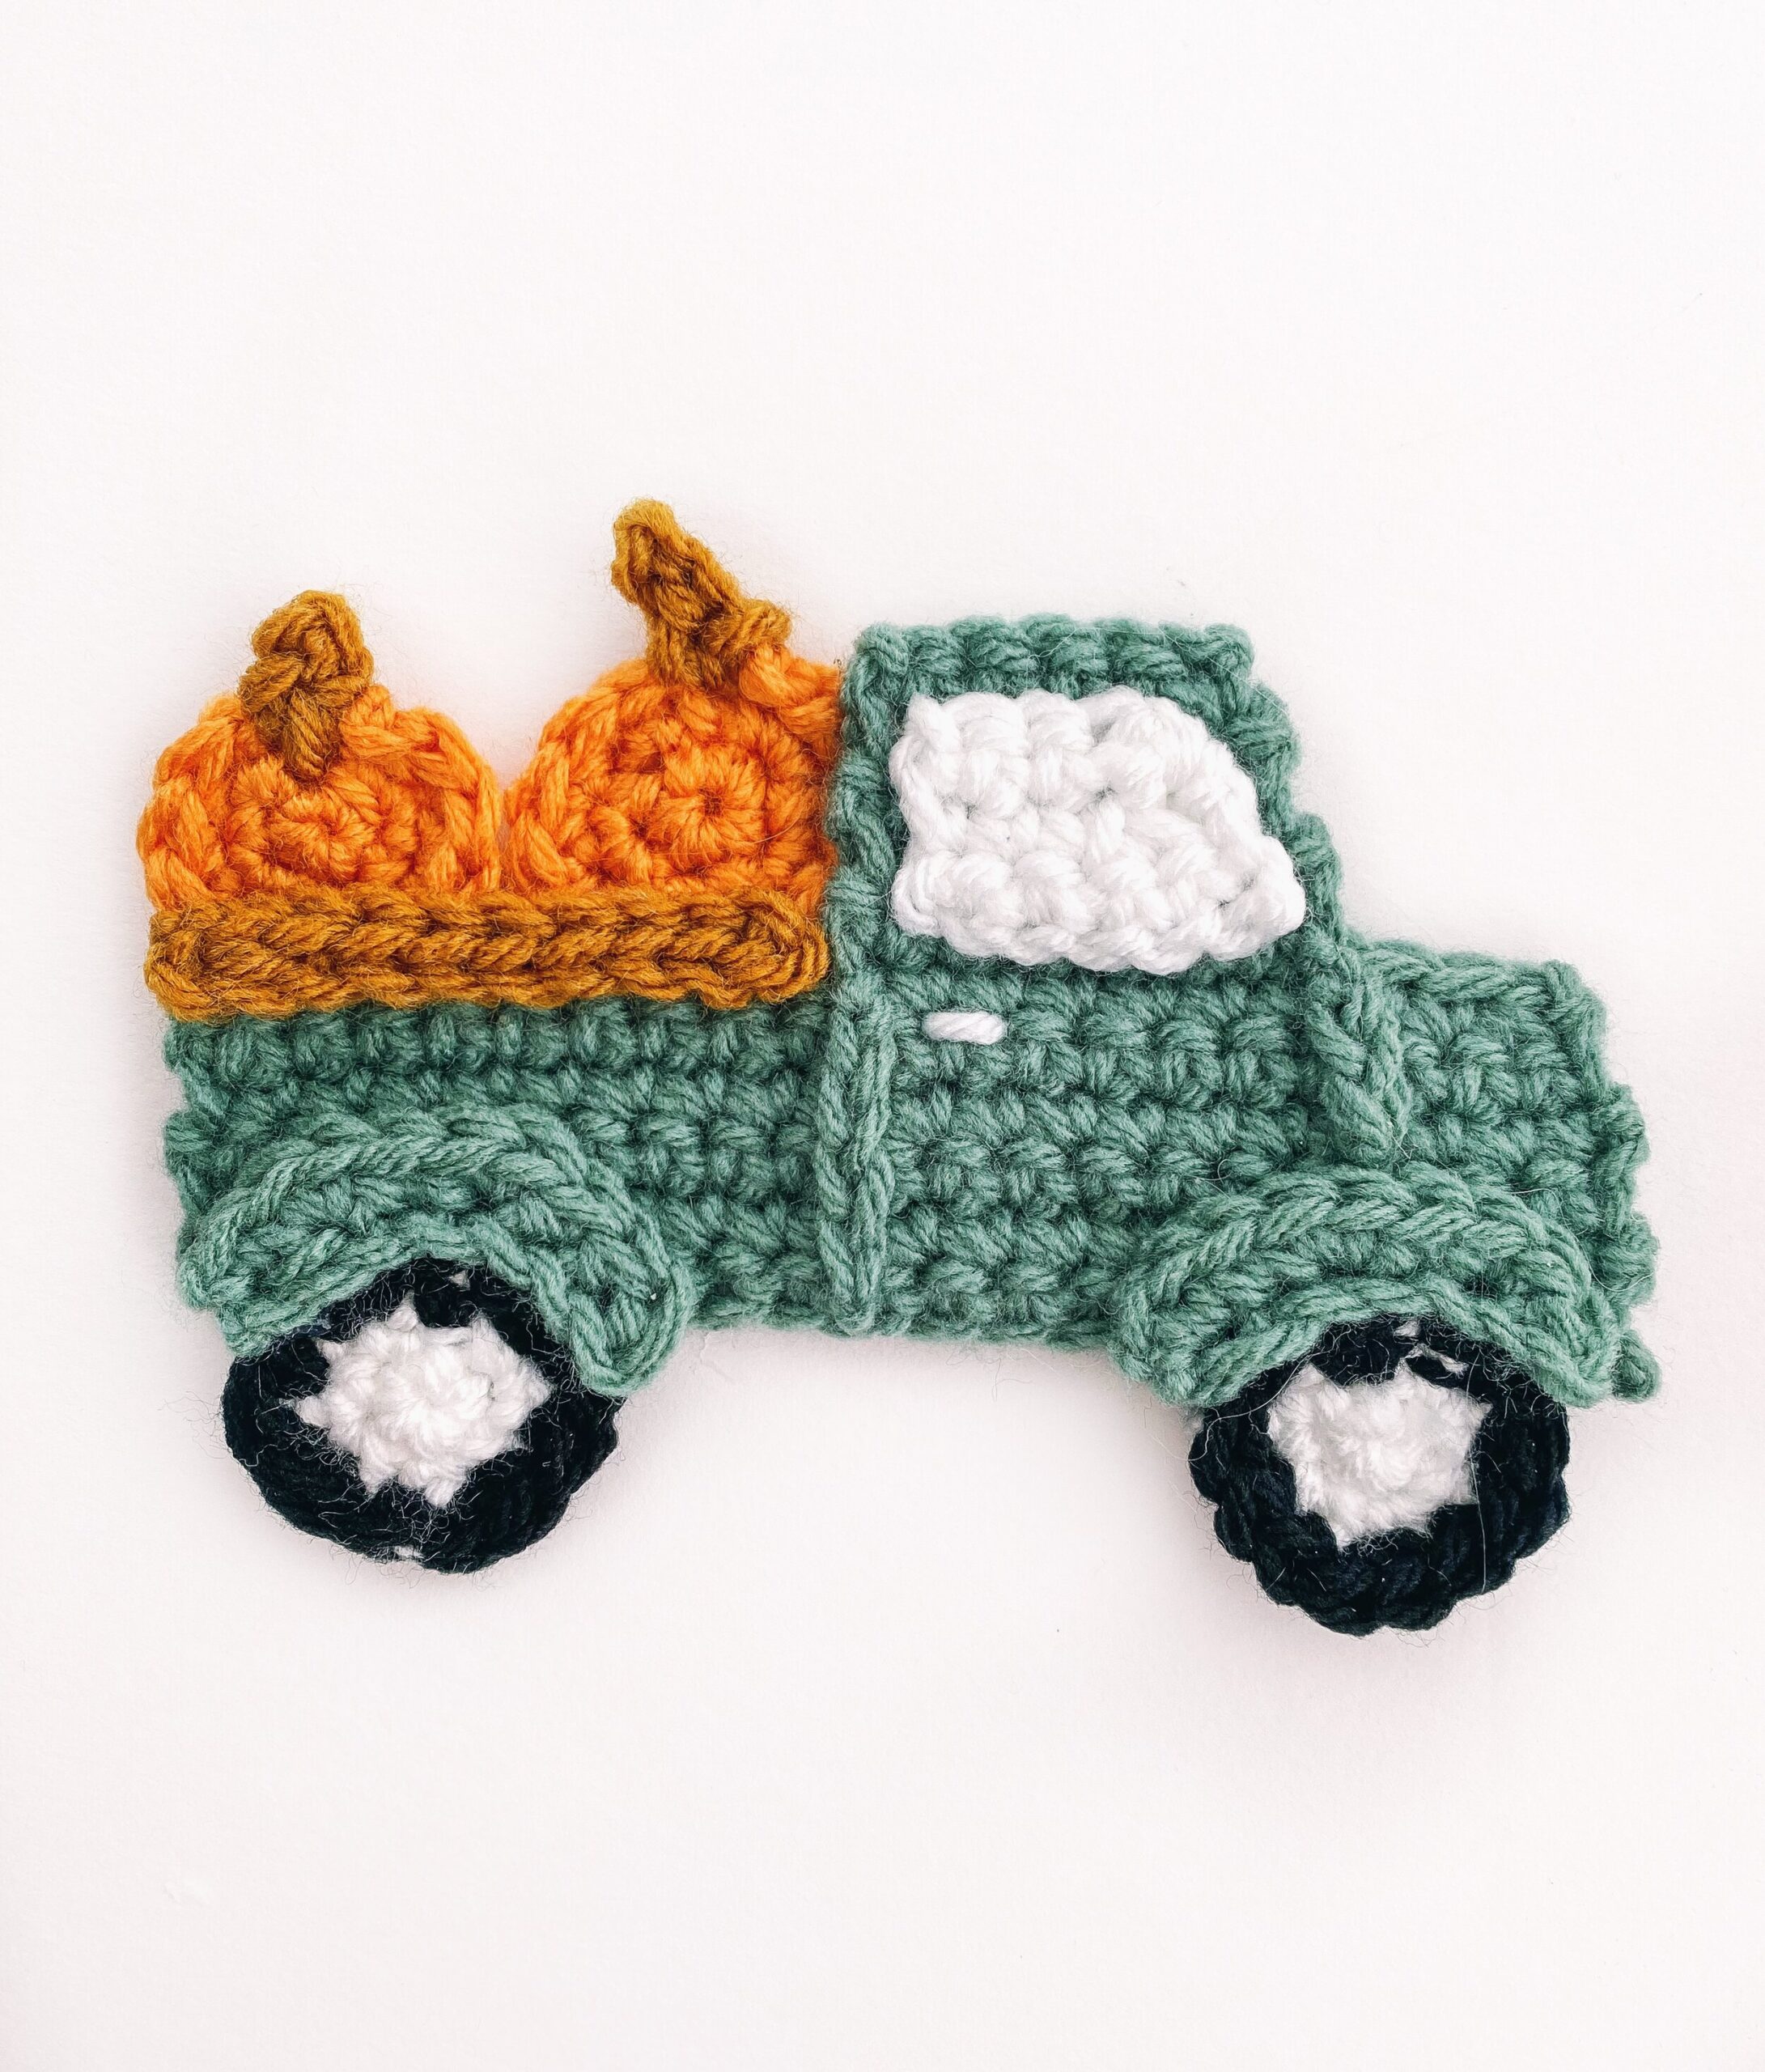
Attach everything together with hot glue. Pull a piece of white yarn through the piece to make the door knob. Make one chain of 5 and a chain of 3 with blue and glue those chains to highlight where the door is. (Use the photo as a guide.)
You can attach the piece to felt and with some string and then use as an ornament. You can also just attach the piece to a bag or card stock. You can also crochet a simple pillow and then sew this appliqué to a pillow.
There are tons of possibilities.
Check out the full video tutorial HERE
And make sure you sign up for my email list to ensure you know all about my free patterns!
Happy crocheting!

Save this image to Pinterest for later!


